Cuda is a
parallel programming which supports c/c++ or even python. If we are trying to
write a cuda program in c/c++ an in windows platform, then visual studio is the
best IDE to start cuda programming. Further Visual Sudio 2005 is the best
version that supports cuda programming.
Now first of
all let’s talk on the installation stuff we need to run the cuda program
- Nvidia display driver
- Cuda toolkit(different version are available)
- Cuda vs wizard(integrates the cuda options in visual studio for project creation)
After we
install visual studo, we need to install cuda toolkit 5 or even different
version.
- Download the cuda toolkit from here
- Install the cuda toolkit, after installation cuda sample browser is installed with it.
- Then install cuda vs wizard which enable cuda option during creation of project.
Steps of creating cuda project in visual studio
- Open visual studio
- Click File->New->Project. The following form with cuda option appears

a 3. Click cuda and name the project
4. After creation of project , the following screen is seen with headers ,source folder
created at the left hand side of the
project.

5. Right click on source
->Add->new Item. The following options will appear as

5) Click on cuda, name the file as
cuda.cu
6)Then
write the cuda program in it.
7) Go to main project->right
click->custom build rules as

8) Check theCuda runtime API Build rule
at the last as
 8
8
9) Go to the main project->right
click->properties->linker->input and
in additional dependiences add
cudart.lib

10) Go to Tools->options->project and
solution->vc++ directories and give the path to include as
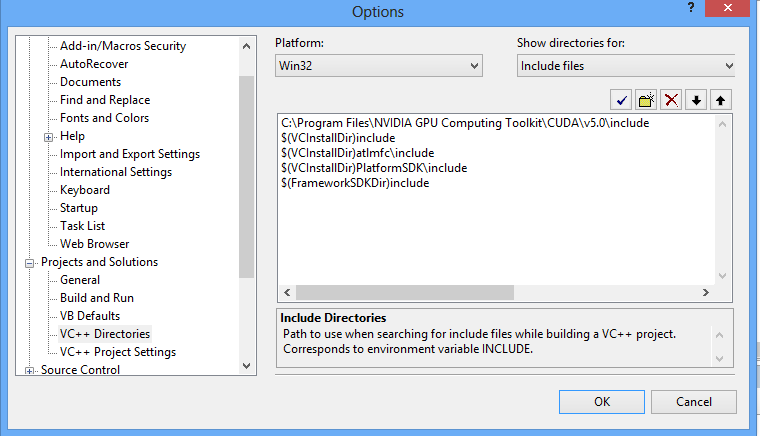
111)Go to dropdown and select library files as and set the path to the win32 as

f
114) then finally copy and paste the simple hello world code from here build the program and run. Happy Coding
No comments:
Post a Comment